All of my textures were created in Adobe Photoshop at a size of 1024 pixels by 1024 pixels.
This is a wood texture. To create this I started off by selecting two wooden colours, one light and the other slightly darker. I then applied the fibres filter by going filter/ render/ fibres. In here I increased the variance slightly. I then applied a motion blur at an angle of 90 to stretch the fibres more. This created my wood but I wanted to make it look like that one panel can fit into the next one. I did this by using the rectangular marquee tool and creating a selection from top to bottom but very thin. I then filled this with black and added an inner shadow to it. I then reduced the fill of that layer and duplicated it 2 more times over my texture.
This is my marble texture. I made this making sure my foreground and background colours were black and white. I then applied the clouds filter then applied the difference clouds filter. I repeated the render clouds filter a few more times. I then duplicated this layer and chose the find edges filter. I then moved this layer behind the first and reduced the opacity of the top layer. After this I went image/ adjustment/ levels and increased the black slider and reduced the white one a bit.
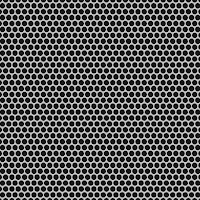
 This is my metal mesh texture. I made this texture by firstly creating a pattern of five circles in a smaller sized document. I then went back into my original document and filled the background with a lighter shade of black. I then made a new layer and filled it with a light grey. After this stage I added noise to it and then gave it a motion blur to stretch the noise out. I then simply went into the blending options for that layer and gave it a pattern overlay with my previously created pattern. I then selected of all the circles in the pattern and deleted them so I was left with holes. I then added the bevel and emboss option in the blending options.
This is my brick texture. I started off with an image of a red brick wall and used the rectangular marquee tool to get a long brick, and a short brick. With these two bricks, I took them into a new document and added some colour to them and added some lighting effects with the use of the channels. I then presented the bricks in the pattern of a line of short bricks then a line of long bricks. After that I used the clone tool, spot healing tool and the eraser to make each brick slightly varied in shape and pattern. I then filled the background with a light cream colour and added noise to it to give a cement effect.
This is a texture of denim. I started to make this by filling my background with a dark blue then creating a new layer and filling that with 50% grey. I changed the blend mode to multiply for that layer. I then went filter/ sketch/ halftone pattern the added another filter to it which was the mezzo tint, found in filter/ pixelate/ mezzo tint. I then duplicated this layer and rotated by 45 degrees and scaled it a bit bigger to fit the screen with no cut corners. I then changed this layers blend mode to soft light.
This is my grass texture. I created this by firstly filling my background with a green. I then added noise to it and put the amount up to 400, distribution to Gaussian and clicked the monochromatic box. I then went filter/ stylize/ wind and changed the method to stagger and the direction to from the left. I then rotated my image 90 degrees clockwise and repeated the process from applying the wind filter. I did this twice more to have blades of grass in all directions.
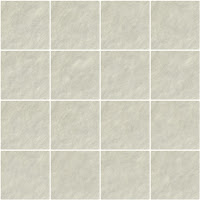
 This is a texture of concrete pavement tiles. I did this by using the rounded rectangular tool to create the main shape. I then added the clouds filter to it and created a new layer with a greyish cream colour and turned the opacity down. I then went to the channels and duplicated one of them, then went into my lighting effects and selected this new channel under the texture channel option and changed my light type to directional. This gave a bumped effect to the tile. I then added grey to the background and some noise to it. After this I tiled it four times across and down then used the clone tool and the spot healing tool to make each tile different.
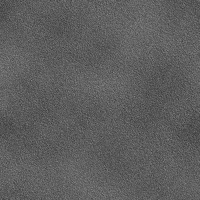
 This is my tarmac texture. I started off making this by filling my background layer with black. I then simply added noise to it then went into the channels and duplicated one of them. Then with this selected I went back into my layers and went filter/ render/ lighting effects. In here I made my light type a directional one and changed the texture channel to my one that i had created. I then put the slider below it a more flat side rather than the mountainous side. I then created a new layer, making sure my foreground and background colours were black and a lighter shade of black, then went filter/ render/ clouds. I then reduce the opacity of this layer.
This is my rough wall texture. I started to create this by selecting 2 dark creamy brown colours. I then used the difference clouds filter a few times. After that I duplicated this layer and went filter/ stylize/ trace contour. I selected several parts of this layer with the magic wand tool, as it was separated, and deleted these selected parts. I then changed the levels of this layer and made it slightly darker. After that I gave it a drop shadow in the blending options and changed the angle to 0. This created an effect as if paint had peeled off. I then created a new layer 40% opacity and used several brushes to create scratches and dirt on the wall.
This is my glass texture. I made this by making my foreground and background colours white and a light grey. I then went filter/ render/ clouds. After that I applied a plastic wrap filter and changed the highlight strength to 8 and the detail and the smoothness to 15. I then went on to making the glass pattern. I did this by going filter/ distort/ glass. In here I edited the distortion to 20, the smoothness to1, the texture to blocks and the scaling up to 200%.


No comments:
Post a Comment